Horizon ERP Tutorial
GST Filling
- Step 1:- Reports → GST Reports
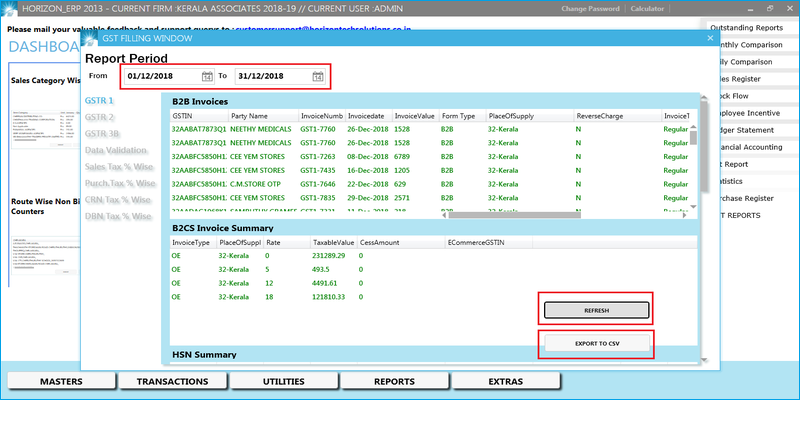
- Step 2:- Enter the date period and Click on Refresh button. After display the report click on "Export to CSV"
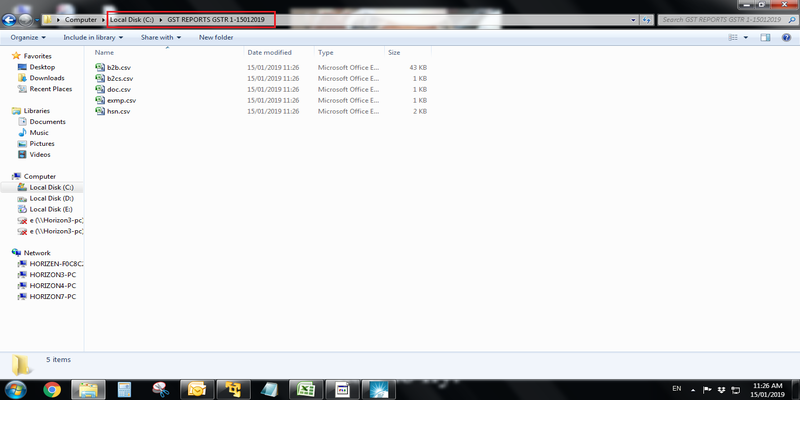
- Step 3:- Displayed a message box as "Process complete, exported to:-C: \GST Reports GSTR 1-date" → Click ok
- Step 4:- CSV files saved in C drive
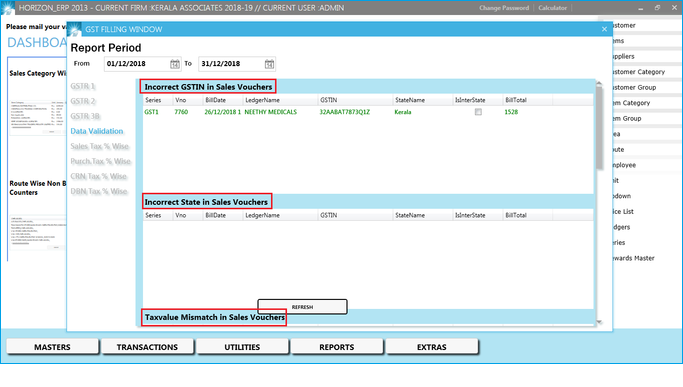
- Step 5:- Check whether the reports are tally, if any mismatch occurred, go to "Reports → GST Reports → Data Validation reports".
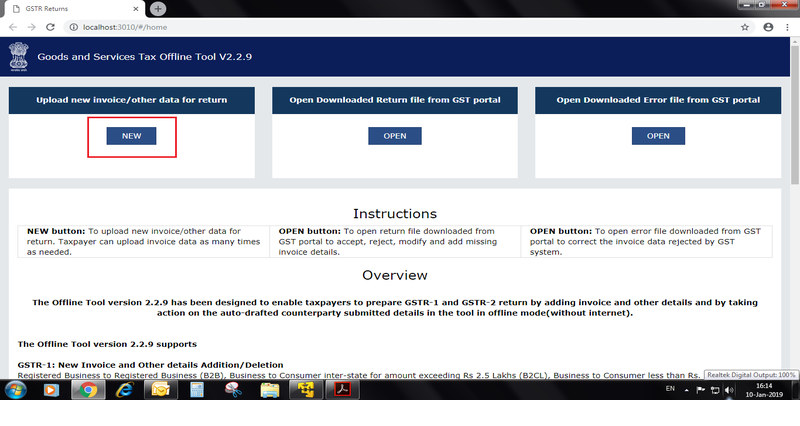
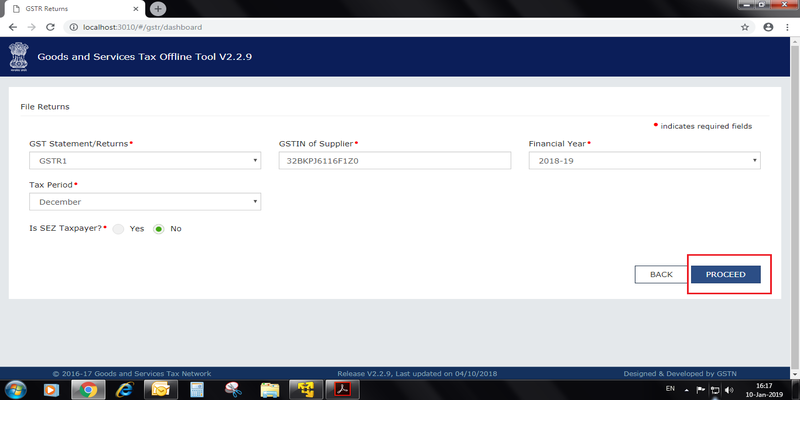
- Step 6:- Open Offline utility → Click on "New"
- Step 7:- Fill all the fields and click on "Proceed"
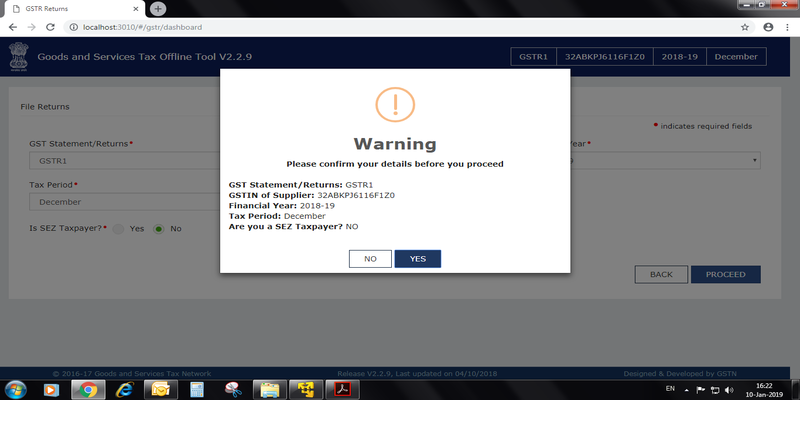
- Step 8:- Confirm GST details and Click on "Yes"
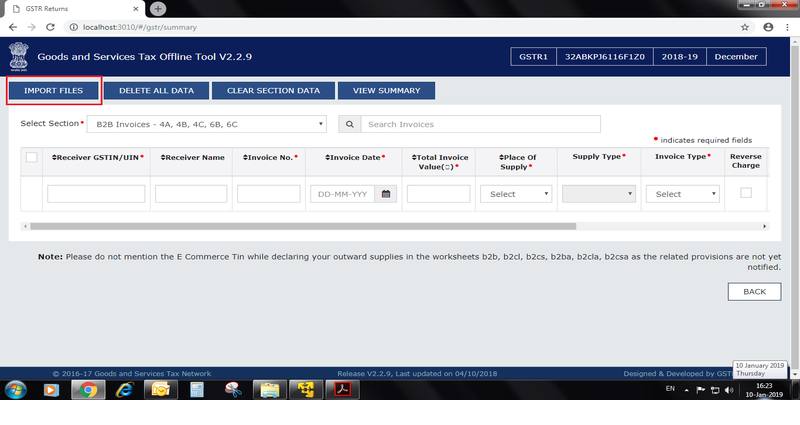
- Step 9:- Click on "Import Files"
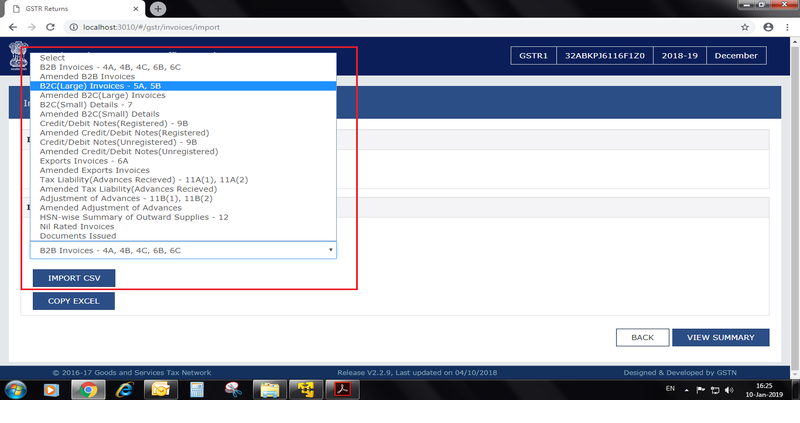
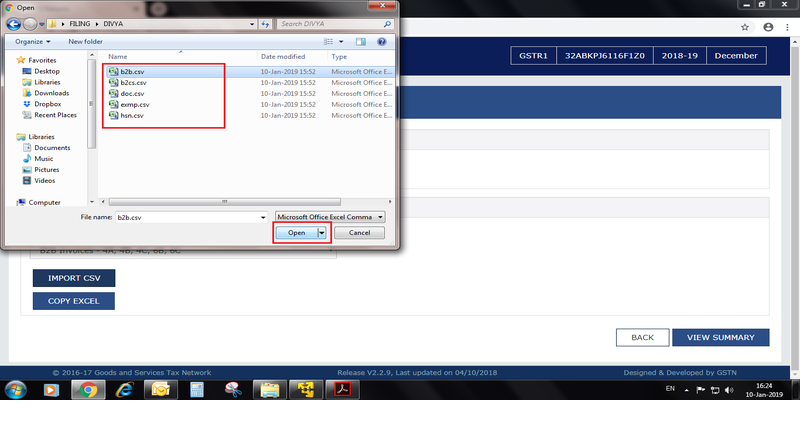
- Step 10:- Select Section (B2B, B2CS, HSN, exempt, etc…)
- Step 11:- Select csv file → Open
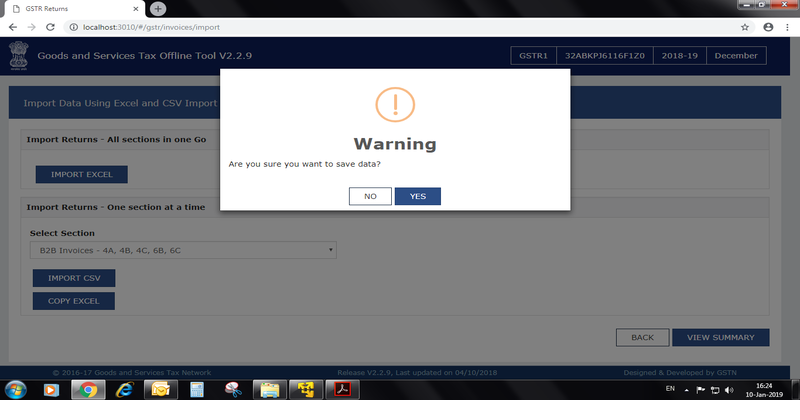
- Step 12:- Click "Yes" for save data
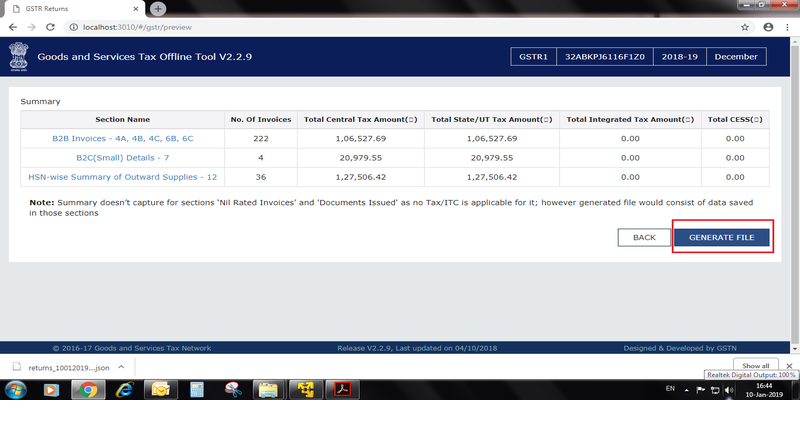
- Step 13:- Click on "Generate file" for generating JSON file.
- Step 14:- Click on the link for downloading JSON file.
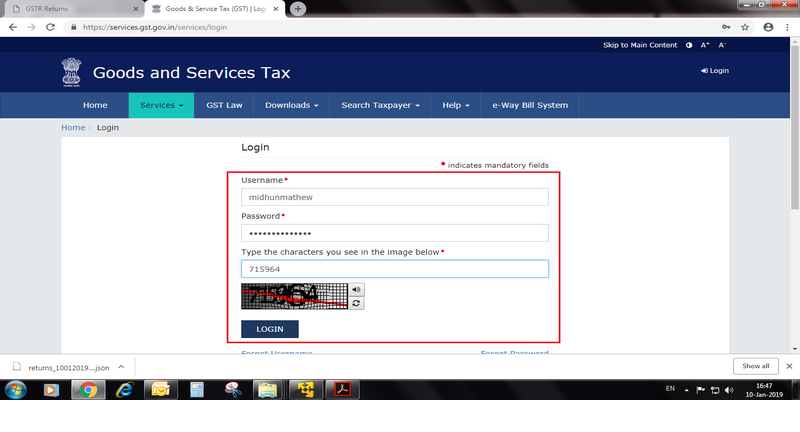
- Step 15:- Open "gst.gov.in" site → Click on "Login"
- Step 16:- Login with Username and Password
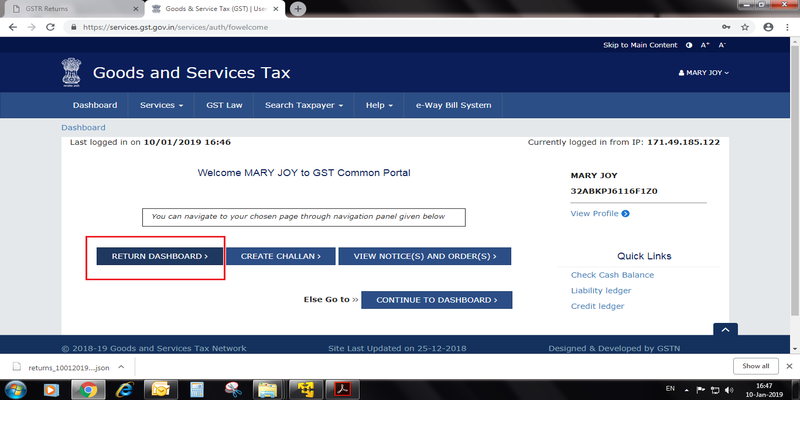
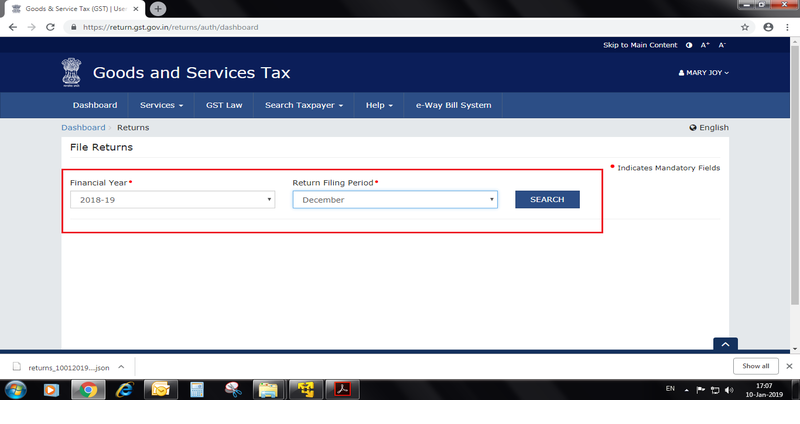
- Step 17:- Click on "Return Dashboard"
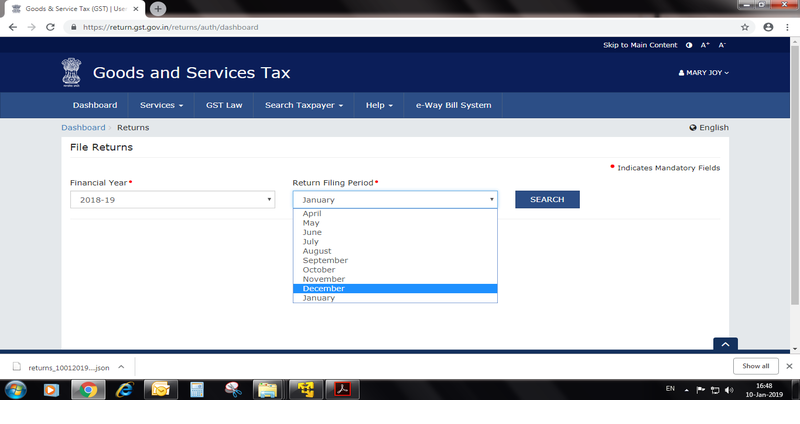
- Step 18:- Select the Financial year and Return Filing period → Search
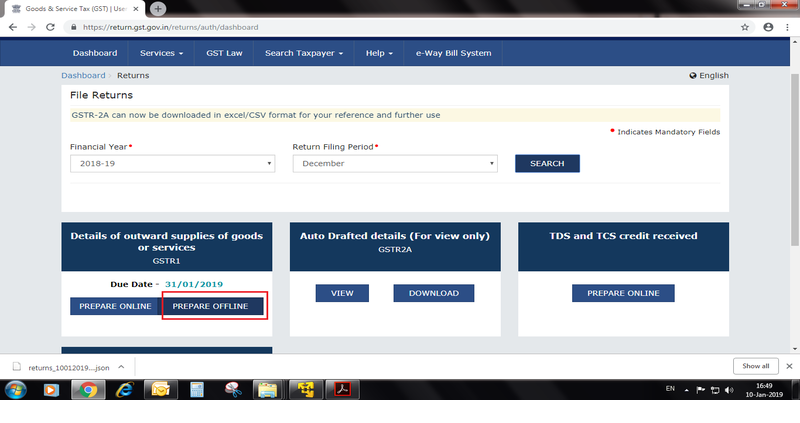
- Step 19:- Click on "Prepare Offline"
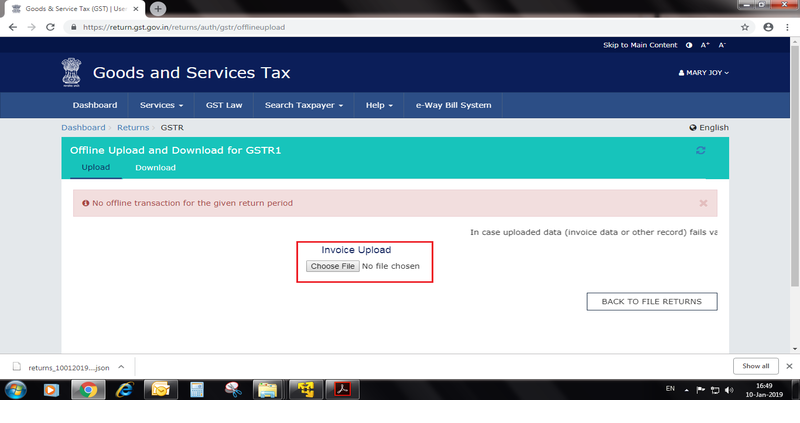
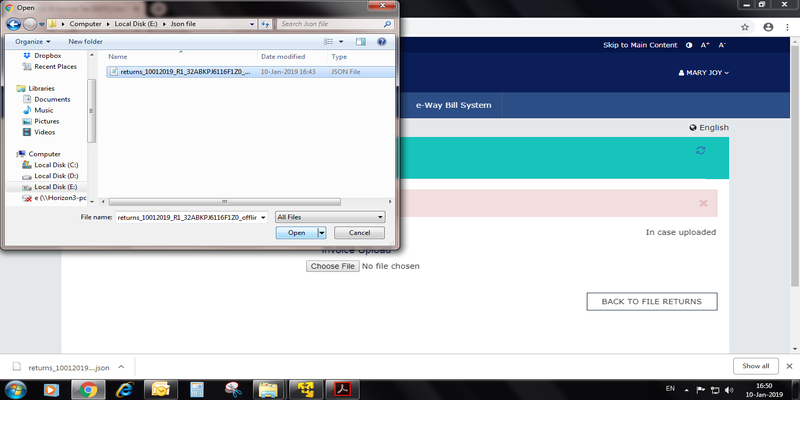
- Step 20:- Click on "Choose File" → Choose JSON file
- Step 21:- Select JSON file → Click "Open"
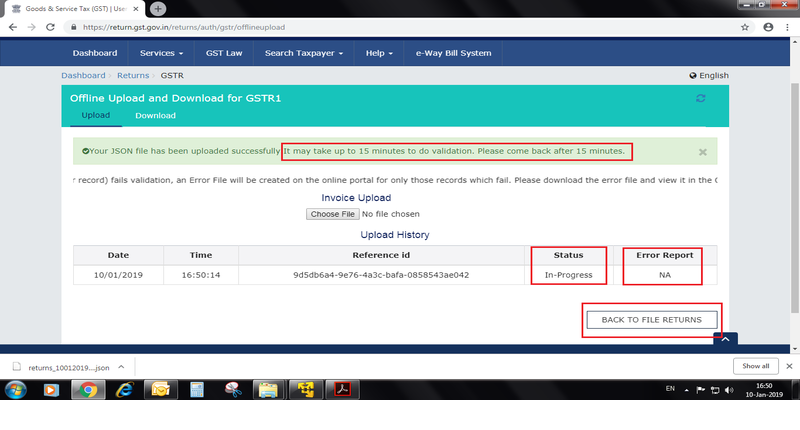
- Step 22:- Uploading process may take up to 15minutes for validation
- After completing upload process, status will change to "Processed".
- If any mismatch in your data, it will shown in "Error Report" .
- Click on "Back to File Return"
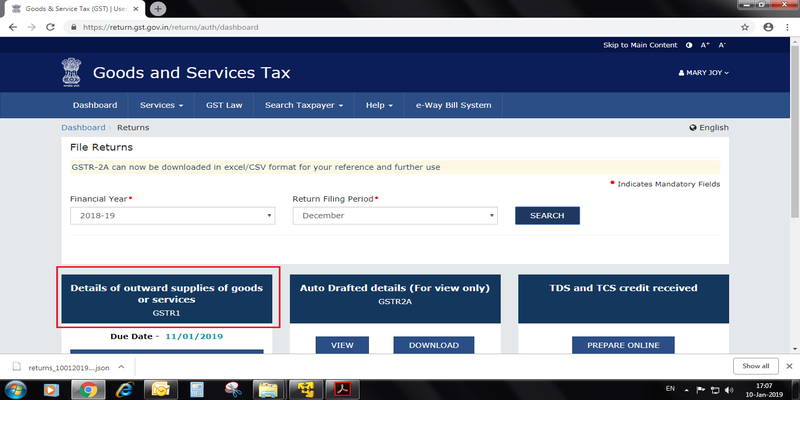
- Step 23:- Select the filing period
- Step 24:- Click on GSTR1
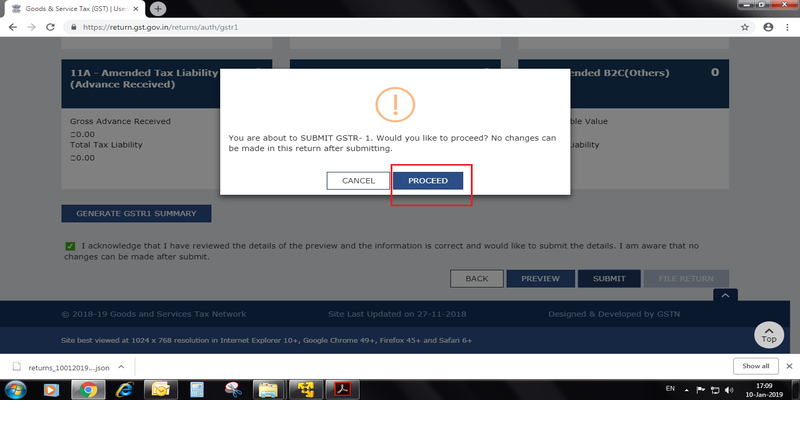
- Step 25:- Tick on acknowledgement → Click "Submit"
- Step 26:- Click on "Proceed" – No changes can do after return submitting.
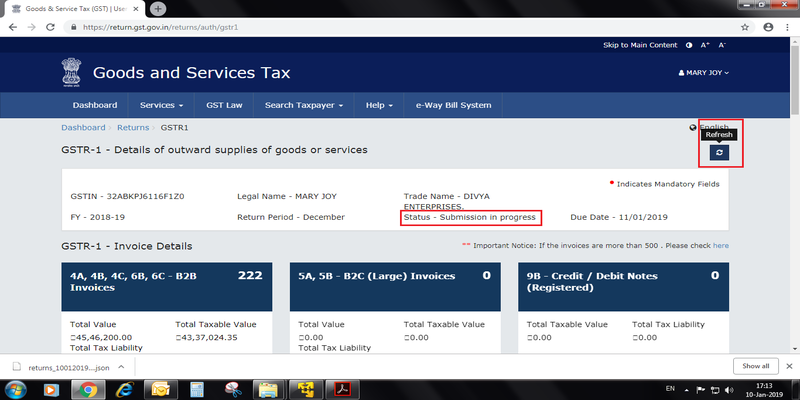
- Step 27:- Refresh the window, and wait few minutes until the status change to "submitted".
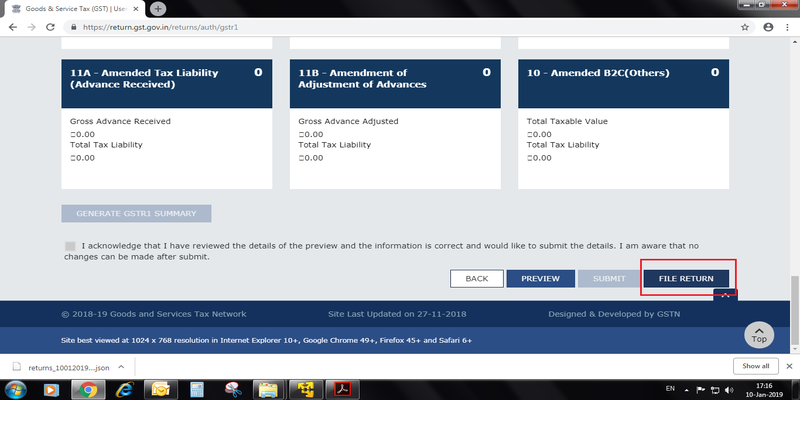
- Step 28:- Click on "File Return"
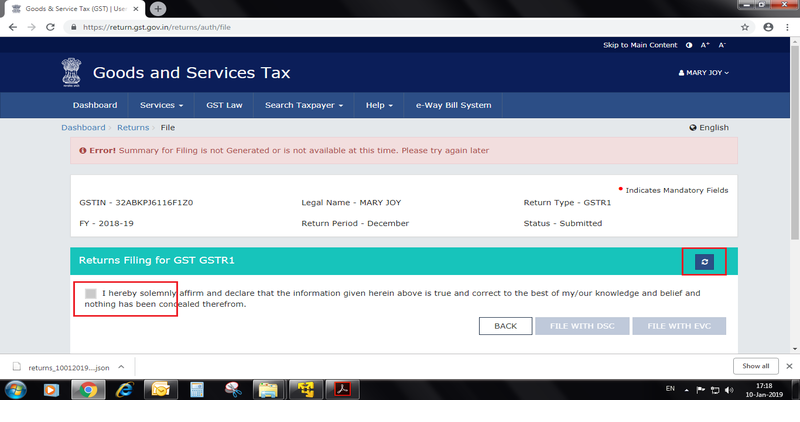
- Step 29:- Refresh the session and wait till the tick box getting enable.
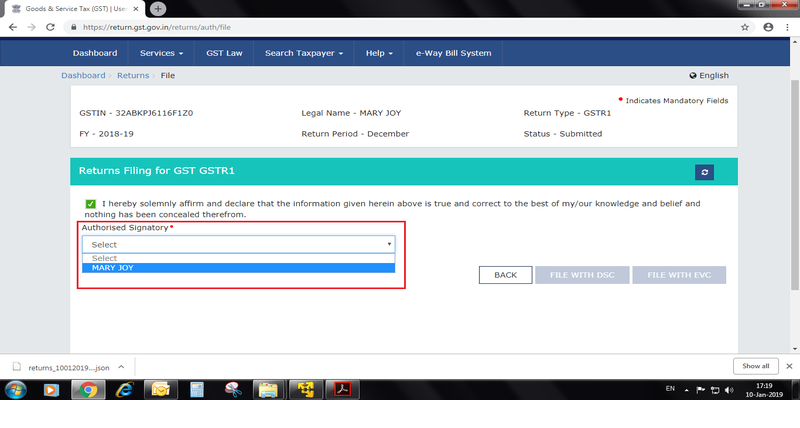
- Step 30:- Tick to confirm the information and Select "Authorized Signatory" from the list.
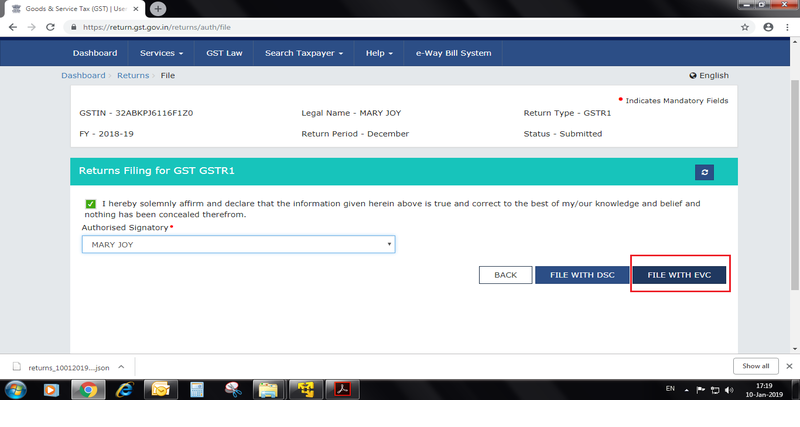
- Step 31:- Click on "File with EVC"
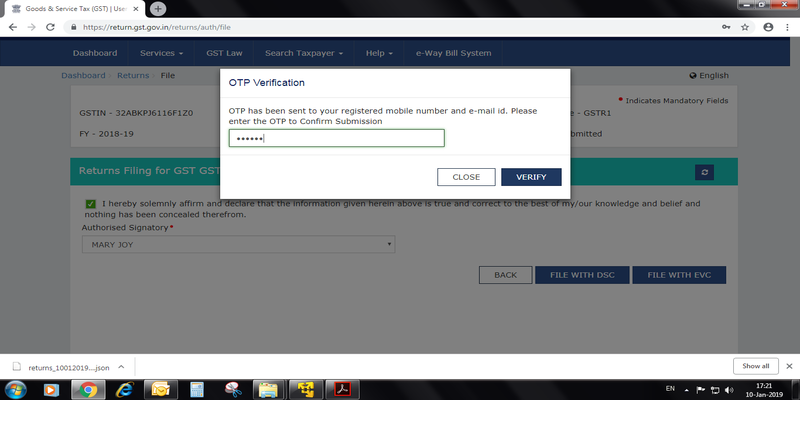
- Step 32:- OTP will send to the registered mobile no. and email. Enter the OTP for confirm submission. → Click on "Verify"
- Step 33:- Logout

